
Are you looking to elevate your artistic skills with precision and accuracy? The grid method might be the answer you’ve been searching for. This time-tested technique empowers artists to create accurate grid pictures, ensuring proportions and details are spot on. Utilizing online grid drawing tools can further streamline the process, making it accessible and efficient for both traditional and digital artists.
In this article, you will learn how to effectively use the grid method, explore various tools available, and discover ways to enhance your artwork using online tools. With hands-on experience and practical tips, you’ll soon master grid drawing techniques and bring your artistic visions to life.
Understanding the Basics of Grid Drawing
What is the Grid Method?
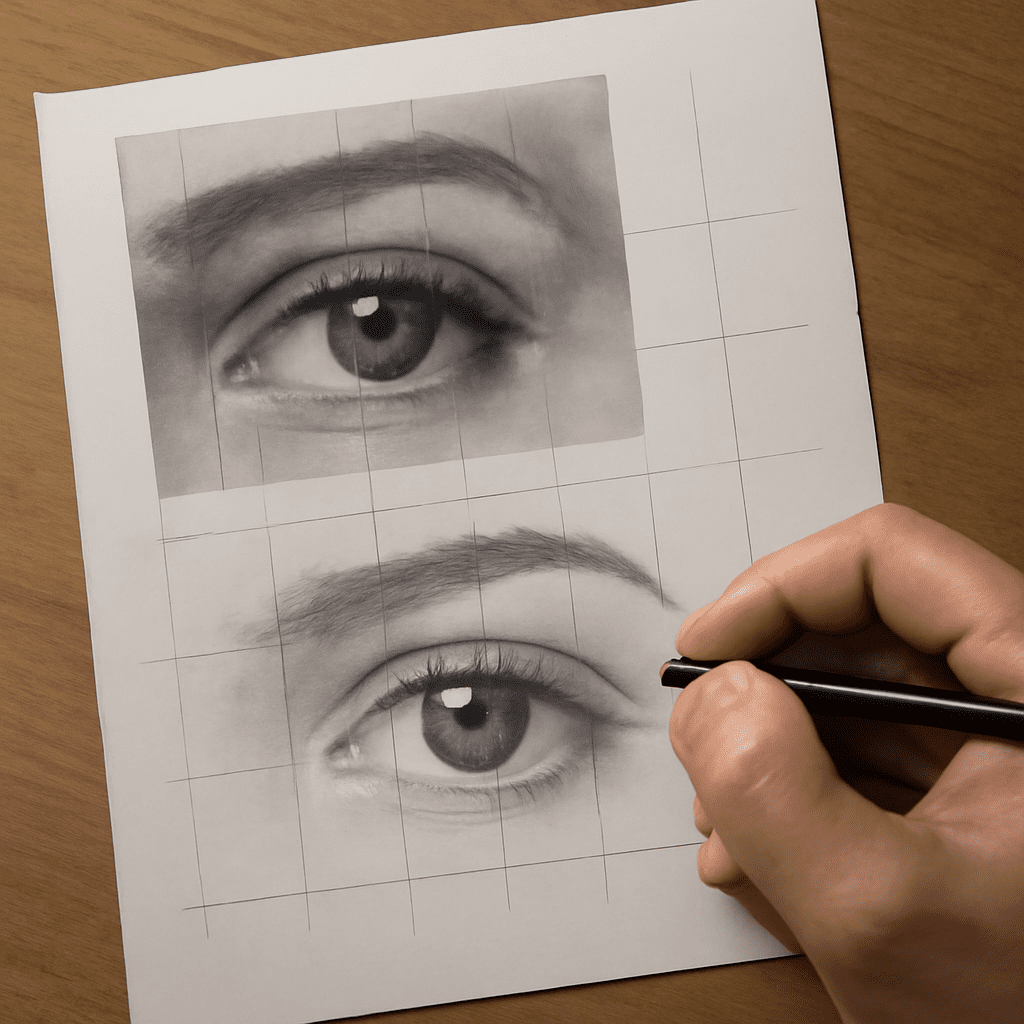
The grid method is a drawing technique used by artists to transfer an image from one surface to another while maintaining accurate proportions. By placing a grid over the reference image and a corresponding grid on the drawing surface, you can focus on one square at a time, breaking down complex images into manageable parts. This technique is particularly useful for creating precise grid pictures, whether you’re working on portraits or landscapes.
History of the Grid Technique
The grid technique dates back to ancient times, utilized by artists such as Leonardo da Vinci and Albrecht Dürer. Historically, it served as a tool to ensure accuracy in reproductions and has evolved with technology, now allowing you to use online grid drawing tools for even greater ease and precision. The traditional method involved manually drawing grids on paper, but digital tools have simplified the process significantly.
How to Use the Grid Method Effectively
Setting Up Your Grid
Begin by selecting a reference image and deciding the size of your grid. Divide the image and your drawing surface into equal sections. Each square should correspond to a part of the image you wish to replicate. This setup is crucial for achieving accurate grid pictures, as it ensures each element is proportionally correct.
Whether you choose to draw the grid manually or use digital grid tools, ensure that each section is equal in size. Double-check measurements to avoid distortion, which can lead to inaccuracies in the final artwork.
Transferring Your Image
Once the grid is in place, start transferring the image square by square. Focus on replicating the lines and shapes within each section rather than the entire picture. This incremental approach simplifies the process, allowing for meticulous detailing.
Using online grid drawing tools can further ease the transfer process. These tools often offer features like zooming and layering, letting you concentrate on specific areas without losing sight of the overall composition.
Choosing the Right Grid Tool for You
Traditional vs. Digital Grid Tools
Deciding between traditional and digital grid tools depends on personal preference and the nature of your art. Traditional grid tools involve manual setup, which can be time-consuming but offers tactile engagement. On the other hand, digital tools are efficient and versatile, providing features like adjustable grids and image overlays.
Consider the type of artwork you create and your comfort level with technology. Digital grid drawing tools online can be beneficial for artists seeking precision and ease of use, while those who enjoy hands-on experience might prefer traditional methods.
Benefits of Using Grid Drawing Tool Online
Online grid drawing tools offer numerous advantages, such as convenience, accuracy, and versatility. These tools allow you to adjust grid sizes, overlay images, and even save progress digitally. With advancements in technology, you can experiment with different settings to enhance your art without worrying about erasing or redrawing grids.
Furthermore, online tools provide a platform for you to try different styles and techniques, making them ideal for both beginners and seasoned artists. Their accessibility means you can practice wherever you have internet access, broadening your creative horizons.
Creating Your First Grid Picture
Step-by-Step Guide
Creating your first grid picture involves a few simple steps. First, select your reference image and decide on the grid size. Draw grids both on the image and your drawing surface, ensuring accuracy. Then, begin transferring each square’s contents methodically, paying close attention to detail.
As you work through the squares, continue checking proportions and making adjustments as needed. Take breaks if necessary to maintain focus and precision. This methodical approach ensures your final piece reflects the original image accurately.
Common Mistakes to Avoid
While the grid method is straightforward, common mistakes can hinder your progress. Avoid using uneven grids, as this can distort the image. Double-check measurements and ensure each square aligns perfectly across both surfaces. Additionally, resist the urge to rush; patience is key to achieving precise results.
Taking time to understand and implement the grid technique is essential for success. Practice regularly to refine your skills and become adept at creating detailed grid pictures.
Enhancing Your Art with Online Grid Tools
Online grid tools offer you innovative ways to enhance your artistic endeavors. These digital platforms allow for greater flexibility, enabling you to experiment with different grid sizes and overlay options. They also help streamline the process, saving time and effort while maintaining accuracy.
Utilizing these tools can improve your technique, especially if you’re looking to create intricate designs or need assistance with proportions. Embrace the possibilities digital tools offer to refine and elevate your artwork.
Safety Recap: When using digital tools, ensure your devices are secure and software is updated. Protect your eyes by taking breaks regularly when working on screens. Proper care of your equipment will prolong its life and enhance your creative experience.