
Do you want to experience a sensory journey that unleashes your creativity while also ensuring a stress-relieving activity? Cloud slime might just be the answer. Nowadays, it’s become increasingly popular to make slime with shaving cream. This unique mixture promises a fluffy texture that is both delightful to touch and visually appealing. By carefully following a few steps, you can discover how slime made with shaving cream transforms ordinary materials into an extraordinary outlet for creativity and fun.
Creating slime with shaving cream allows for a customizable experience that extends beyond traditional crafting. By using easily accessible materials and following a structured process, you can unlock an engaging form of artistic expression. So, let’s dive into the world of fluffy slime and explore the magic behind this trending phenomenon.
Why Cloud Slime is the Latest Craze
What Makes Cloud Slime Unique
Cloud slime captivates enthusiasts with its soft, airy texture and visual appeal. Unlike standard slime, cloud slime incorporates shaving cream, giving it an extraordinary puffiness. This difference in texture is what makes cloud slime stand out in the broader slime community. Shaving cream not only adds volume but also provides a tactile experience that is both smooth and stretchy. These properties make it particularly popular among those seeking a soothing, stress-relieving pastime.
Benefits of Using Shaving Cream in Slime
Including shaving cream in your slime recipe offers multiple advantages. First, it enhances the fluffiness, making the slime pleasant to play with. Additionally, it imparts a subtle, clean scent that enhances the sensory experience. Shaving cream also helps the slime hold its shape better, allowing for more extended play and the creation of intricate designs. These benefits make it an essential ingredient for those looking to craft the perfect fluffy slime.
Gathering Your Materials
Essential Ingredients for Fluffy Slime
To start your slime-making journey, you’ll need a few key ingredients. Ensure you have white school glue, baking soda, and saline solution. The star ingredient, of course, is the shaving cream. Optional add-ins include food coloring and glitter for extra flair. Having these ingredients ready will make the crafting process seamless and enjoyable.
Recommended Tools for Slime Creation
Assembling the right tools is essential for crafting cloud slime. You’ll need a mixing bowl, a spatula or spoon for stirring, and measuring cups for accuracy. For those looking to add a personal touch, additional tools like droppers for coloring, or molds for shaping designs, can be beneficial. Proper preparation ensures a more efficient and pleasant creation process.
Step-by-Step Guide to Make Slime with Shaving Cream
Preparing Your Workspace
Before you begin, set up a clean, clutter-free workspace. Lay down a protective covering like wax paper or a plastic cloth to prevent messes. Organize your ingredients and tools within reach, ensuring a smooth workflow and minimizing interruptions. A tidy area allows you to focus entirely on the creative process.
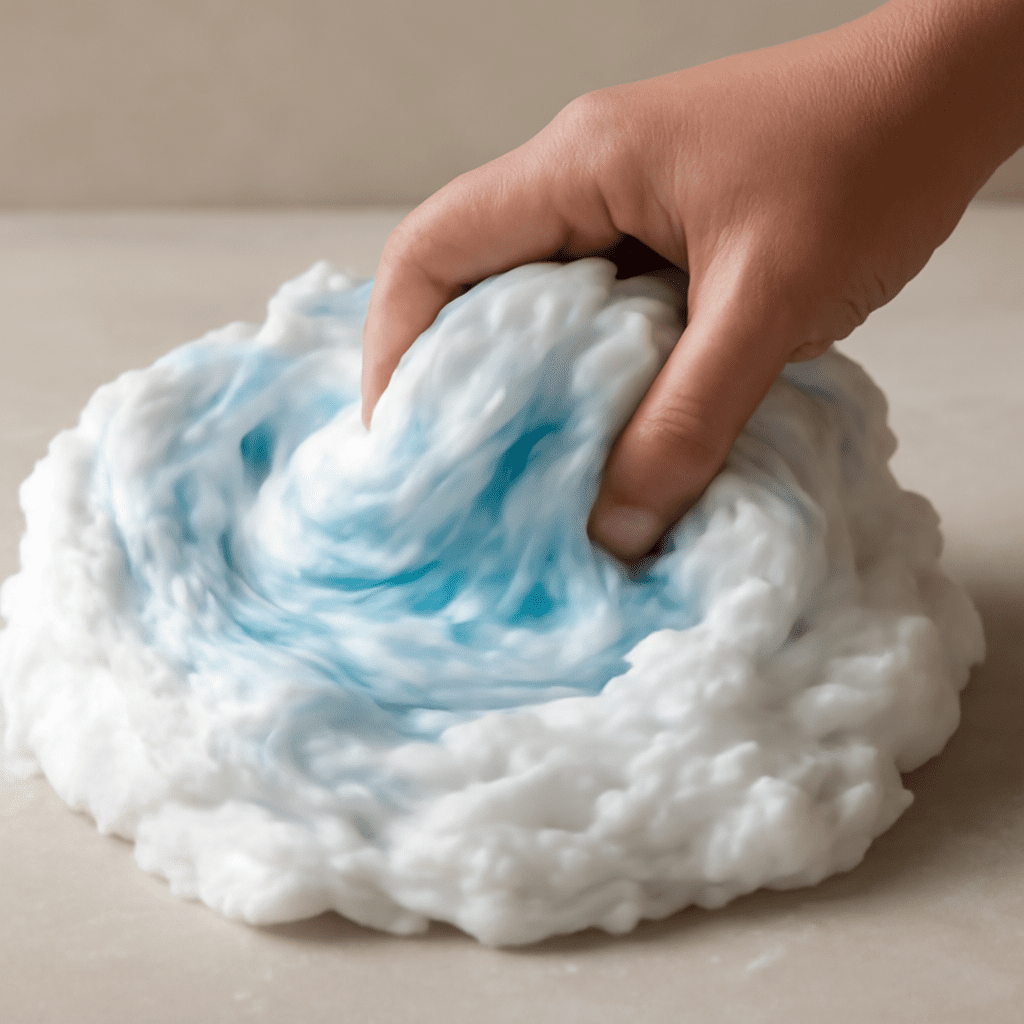
Mixing the Perfect Fluffy Slime
Begin by pouring half a cup of glue into your mixing bowl. Add one tablespoon of baking soda and mix until combined. Next, introduce one cup of shaving cream, stirring until the texture is even. Slowly incorporate saline solution, adding one tablespoon at a time until the slime starts to pull away from the bowl’s edges. Knead the mixture with your hands until it’s no longer sticky, achieving that signature fluffy texture. If desired, add food coloring or glitter for personalization.
Troubleshooting Tips for Slime Made with Shaving Cream
Common Issues and Solutions
Encountering problems while making slime is common, but easily fixable. If the slime is too sticky, gradually add more saline solution, kneading after each addition. Conversely, if your slime is too stiff, adding a small amount of glue can help regain elasticity. Remember to make adjustments slowly to avoid overcorrecting.
Enhancing Your Slime Experience
To elevate your slime-making, experiment with varying the amounts of ingredients. Try using different types of shaving cream for diverse textures, or introduce scents using essential oils. These adjustments can help create a more tailored and enjoyable experience.
The Best Slime Recipe for Creative Practice
How to Personalize Your Slime
Personalization turns a basic slime session into a creative practice. By adding different colors, textures, and scents, you can express your individual style. Experiment with layering colors or embedding small objects like beads or charms to enhance the visual appeal.
Exploring Design and Drawing with Slime
Using slime as a medium for design and drawing can push the boundaries of traditional art. Its malleability allows for easy manipulation, letting you create abstract shapes or intricate patterns. Use tools like sculpting sticks or your fingers to craft unique designs.
Cleaning Up After Your Slime Session
Effective Cleaning Techniques
After you finish, remove any leftover slime by wiping surfaces with a damp cloth. For stubborn residues, a mixture of warm water and soap will do the trick. Clean your tools promptly to prevent the ingredients from hardening and becoming difficult to remove.
Storing Your Slime Safely
To prolong the life of your slime, store it in an airtight container. Keep it in a cool, dry place to prevent drying out or molding. Regularly check the slime’s consistency, and refresh it with a few drops of saline solution if it becomes dry.
Next Steps
Now that you’ve mastered the basics of making slime with shaving cream, continue to experiment and refine your technique. Regular practice and exploration can lead to new discoveries and further enhance your creative skills. Engage with online communities to share your creations and gain inspiration from fellow slime enthusiasts.