


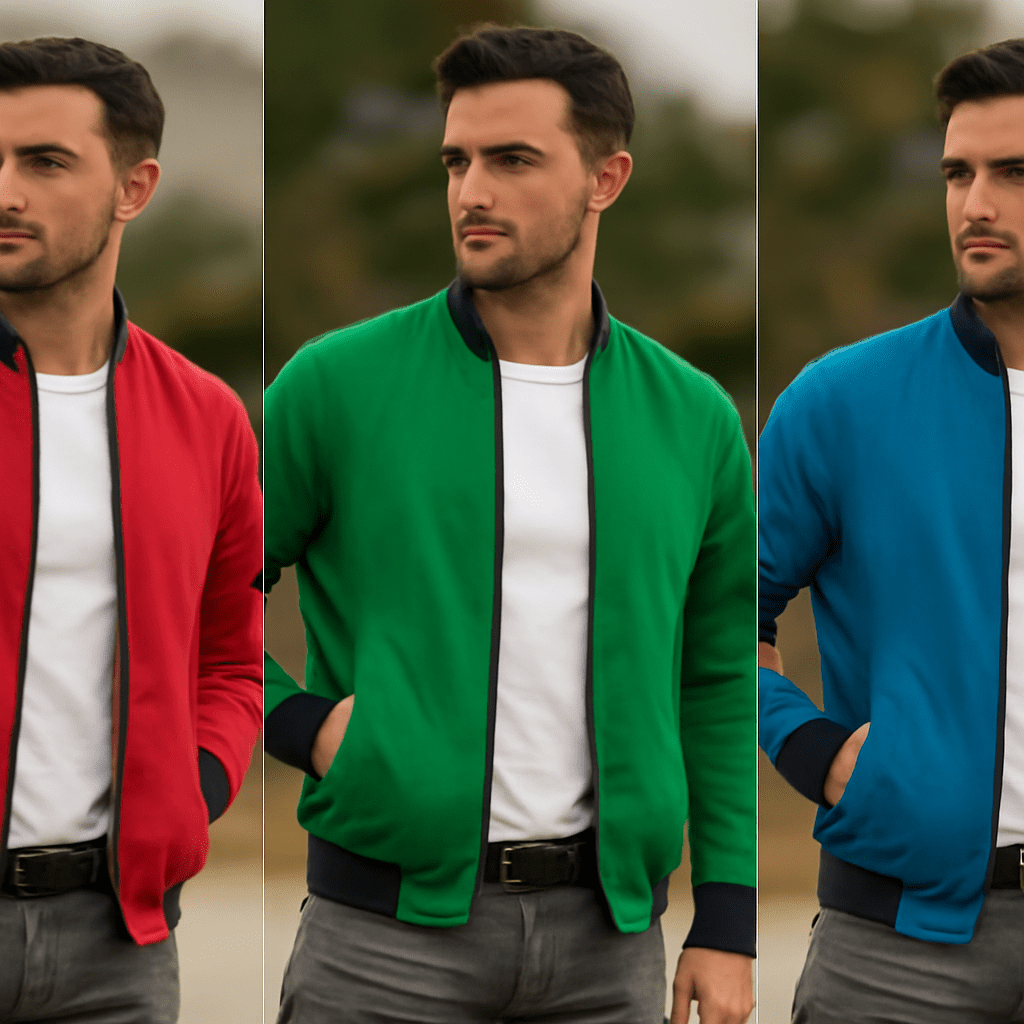
A red jacket contains more than one red. Its folds hold dark shadows, bright highlights, and fine fabric texture. Changing a color in an image works best when those details remain visible beneath the new hue. A picture color-changing tool can help you isolate the jacket before you make the adjustment.
Image Color Changer: Prepare Your Image
Open the image in an editor with selection and color-adjustment controls. Save a copy of the original, then work on a duplicate layer or use an adjustment layer if the editor offers one. This gives you a way to revise the color and restore parts of the original without rebuilding the image.
Decide what should change. A single object with a clear edge can be selected by shape. A color range can be faster when the target hue is distinct from everything around it. If a red jacket and a red sign appear in the same photograph, a color-based selection may include both. In that case, first limit the adjustment to the jacket, then refine the selected tones within it.
An image color changer with a preview lets you compare the result as you work. Zoom in enough to inspect edges, but regularly return to the full image. A color that looks convincing in a close-up may be too vivid against the rest of the scene.
Select the area or color range
For a defined object, use an object, brush, or freehand selection tool to trace its outline. Include the fabric inside the outline, including dark folds and highlights. Avoid selecting the skin, buttons, or background if they need to retain their original colors. The first selection is a draft; you can refine it after seeing the adjustment.
For a color-range selection, sample a representative part of the original color. Adjust the range or tolerance until it includes variations in light and shadow. A narrow range may miss the folds. A broad range may spill onto similarly colored objects. Some editors let you add or subtract sampled colors, which helps capture the jacket without changing the sign.
If available, turn the selection into a mask. A mask controls where the adjustment appears: in many editors, white reveals it and black hides it. Gray produces a partial effect. Check your editor’s convention before painting, then use the mask to protect areas outside the object.
Replace the hue while preserving texture
A hue and saturation adjustment is a practical way to change image color without covering the subject with opaque paint. Move the hue control toward the desired color, then adjust saturation until the result fits the scene. Keep lightness close to its starting value at first so you can judge the color while retaining the existing contrast.
Another approach is a solid-color layer with a color blending mode, clipped or masked to the object. The blend applies the new hue and saturation while using the underlying brightness, so folds and highlights can remain visible. Exact controls vary by editor. Adobe’s object color tutorial illustrates this layered approach.
Suppose the jacket should become blue. Select it, create the adjustment, and move the hue until the midtones look blue. Then reduce saturation if the result looks artificial. Compare the bright shoulder, shaded sleeve, and seams: they should still read as parts of the same material. If the blue is too dark, make a modest lightness adjustment and check that the deepest folds do not disappear.
Changing black or white fabric to a saturated color may require extra tonal work because there may be little original color or detail to shift. Build the effect gradually and examine whether the texture is still visible before committing.
Refine edges and repair accidental color
Inspect the subject at a larger zoom. Look for a thin strip of the original color along the edge, especially around hair, seams, and areas where the jacket meets the background. Use a small brush on the mask to reveal the adjustment over missed fabric. A slightly soft brush can suit a soft photographic edge; use a firmer brush on a sharp graphic boundary.
Now look at nearby objects. If the red sign has turned blue, paint black on the adjustment mask over the sign to hide the change there. If you remove too much from the jacket, switch to white and restore the affected area. Toggle the adjustment off and on to see exactly which pixels changed. Work in short strokes so corrections are easy to undo.
Check the whole image again at its intended display size. A perfect edge at high zoom can still look too sharp or too soft in context. Small traces of reflected color may belong to the original lighting, so compare with the unedited image before removing every hint of red.
Choose an online workflow when it fits
A color changer online can be convenient for a quick adjustment when you do not need a layered project. Look for a preview, a way to select the target area, and a means of controlling the range or strength of the change. Check whether the exported file retains the dimensions and quality you need. Review upload and retention terms before using a private or client image.
An online color changer with a brush or mask is easier to correct when nearby objects share the target hue. To replace color online, first test a small area and inspect the result before processing the complete image. If the tool applies the adjustment permanently, keep your original separately so you can begin again.
Save and check the final image
When you change the color of an image, save an editable copy with its layers or masks if the editor supports them. Export a separate JPEG for a photograph or PNG when its transparency or lossless format is needed. Open the exported file and compare it with the working version at the size it will be used.
You can change the colors of an image in stages when several objects need different treatments: give each object its own selection and adjustment so that one correction does not disturb another. To change the color of a picture cleanly, finish by checking both the subject and the surrounding tones. If a nearby button has picked up the new hue, return to its mask and paint the adjustment away from that button before exporting again.