
Drawing can seem intimidating, especially when starting out. However, with the right techniques, you can learn how to draw a skull easy. This guide will not only help you master the art of sketching a skull but also guide you through drawing other elements like a cherry blossom tree, a simple rose, and more. Whether you’re new to art or brushing up on your skills, this step-by-step approach will make the process manageable and enjoyable.
Understanding basic shapes and refining details are fundamental steps in drawing. With practice and patience, you’ll be able to draw a shell or a spider web effortlessly. By using straightforward methods and easy-to-follow instructions, you can steadily enhance your artistic abilities. Prepare yourself with essential materials, and let’s dive into these drawing basics!
Materials Needed for Drawing
Essential Tools
Before you start, gather the basic tools necessary for drawing. A set of pencils ranging from HB to 4B is crucial. You’ll also need erasers, preferably a kneaded eraser for precise adjustments. A good sketchbook with quality paper is your canvas. These materials ensure you can draw without limitations.
Optional Supplies
While the essentials suffice, adding optional supplies can enhance your experience. Blending stumps help smooth shading. Color pencils or markers offer a way to add vibrancy to your sketches. A ruler can aid in maintaining proportions, particularly when drawing elements like a spider web.
How to Draw a Skull Easy
Basic Shapes
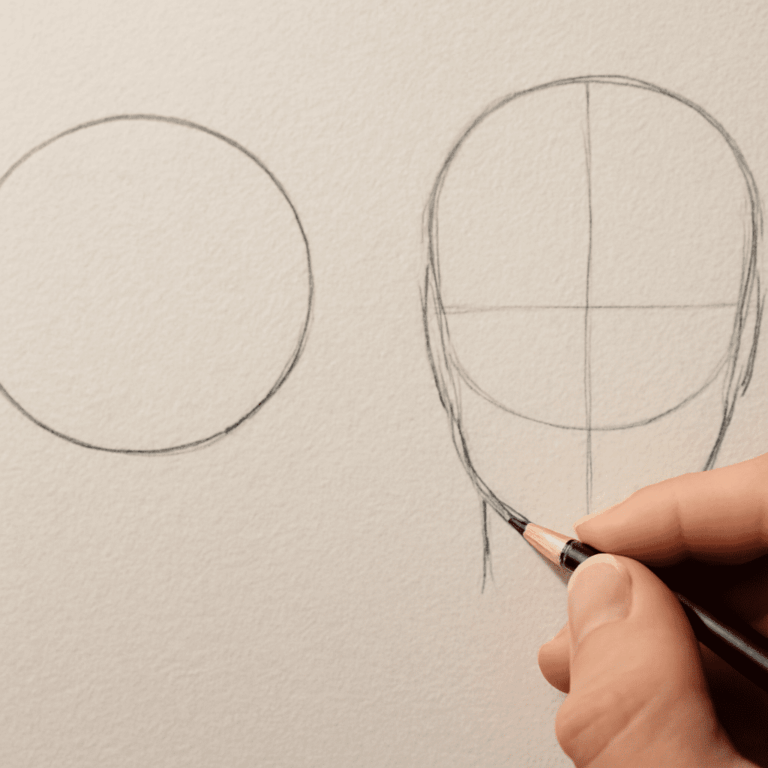
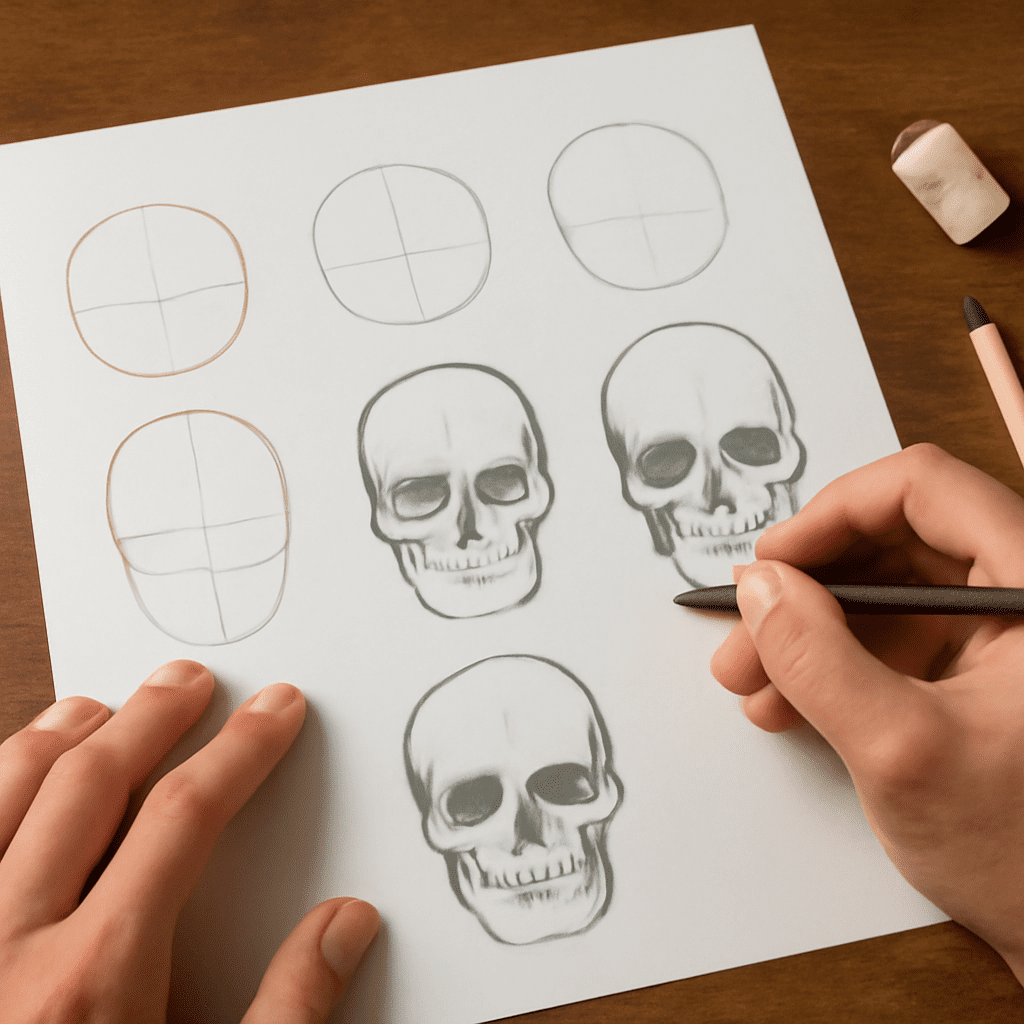
To draw a skull easy, start by outlining basic shapes. Draw a circle for the cranium and an oval beneath it for the jaw. These shapes form the skeleton of your skull sketch. Using light strokes, you can adjust as needed and maintain flexibility in your design.
Refining Details
Once the basic shapes are in place, refine the details. Add eye sockets by drawing two ovals within the circle. Sketch the nasal cavity with a small triangle and add teeth lines. These elements bring your skull to life, moving it from basic structure to detailed art.
How to Draw a Cherry Blossom Tree
Sketching the Trunk
Begin with a simple line for the trunk. Gradually add branches extending upwards and outwards. The trunk and branches should have a natural, flowing appearance. Utilize varying pencil pressures to depict the texture of the bark.
Adding Blossoms
For the blossoms, sketch small clusters of circles at the end of branches. These circles represent the flowers. By varying the size and number, you can create a realistic depiction of cherry blossoms. Use lighter shades and soft strokes for a delicate effect.
How to Draw a Simple Rose
Creating the Outline
Start by drawing a circle to outline the rose’s center. Around this circle, sketch petals by drawing curved lines that overlap slightly. Each petal should be distinct yet form a cohesive flower shape.
Adding Details
Refine your rose by adding depth to the petals. Use shading techniques to give each petal dimension and curvature. Emphasize darker areas with a softer pencil to create contrast, enhancing the rose’s realistic look.
How to Draw a Spider Web
Web Framework
Lay out the spider web by sketching a series of intersecting lines radiating from a central point. These lines form the web’s framework, guiding its symmetrical design. Precision is key here, so take your time with each line.
Final Touches
Add curved lines connecting the radiating lines, forming the web’s spiral pattern. These connections are crucial for the web’s authenticity. Vary the spacing and thickness to add character and realism to your design.
How to Draw a Shell
Basic Shell Shapes
Begin with an elongated oval shape for the shell’s outline. This shape forms the shell’s body. Sketch lightly to allow for adjustments as you refine the details.
Detailing the Texture
Add texture by drawing parallel and curving lines across the shell’s surface. These lines represent the ridges characteristic of shells. Adjust shading to highlight these ridges and give the shell a three-dimensional appearance.
Next steps: Practice consistently to improve your skills. Allocate dedicated time each day for drawing, even if it’s just a few minutes. As you become more comfortable, incorporate varied subjects and techniques. Regular practice and experimentation will enhance your drawing proficiency over time.